 comparison
Cost of Adding EV Charger Circuits: 2026 Price Guide
Table of Contents
- What Adding EV Charger Circuits Actually Costs
- EV Charger Installation Cost: Equipment Versus Labor
- Level 2 Charger Installation Requirements That Drive Price
- When You Need an Electrical Panel Upgrade for EV Charger Circuits
- EV Charger Circuit Permit and Inspection Costs
- Distance, Route, and Other Factors That Change Your Quote
- How to Compare EV Charger Circuit Quotes Apples to Apples
- Frequently Asked Questions
Last Updated: October 17, 2026
What Adding EV Charger Circuits Actually Costs
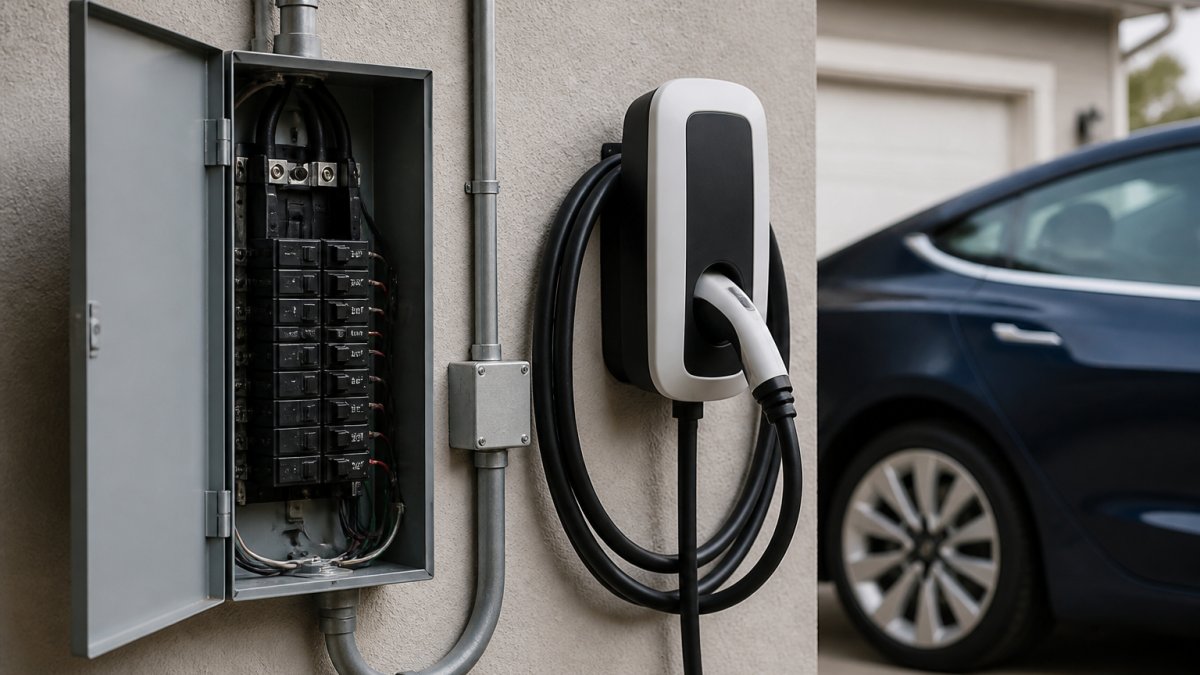
Adding an EV charger circuit is the electrical work of running a dedicated 240-volt line from your panel to a Level 2 charger, and it is the part of the project homeowners understand least. At Hriczak Electrical Contracting LLC, we quote these jobs constantly, and the honest answer is that the cost of adding EV charger circuits depends far more on your panel, your wire run, and your local permit rules than on the charger itself.
That bundling is the problem. A circuit that costs a few hundred dollars in materials and a short afternoon of labor can land inside a five-figure quote once a panel upgrade gets folded in. Below, we break the job into its real parts so you can read a quote and know which line items are fair.
Circuit Materials: Wire, Breaker, and Conduit
Three components make up the hardware side of any new circuit: the wire, the breaker, and the conduit or raceway that protects the wire. Wire is usually the largest material cost because 240-volt charging circuits draw heavy current, which means thick copper conductors. A 40-amp circuit typically calls for 8-gauge copper, and a 48-amp or 60-amp circuit steps up to 6-gauge.
The breaker is a double-pole unit sized to the circuit, and it must physically fit your panel's brand and available spaces. According to EnergySage's EV charger installation cost guide, adding a new circuit is generally best suited to homes that already have open breaker slots and enough capacity, which is exactly why the material list stays short on some jobs and balloons on others.
EV Charger Installation Cost: Equipment Versus Labor
Equipment and labor are two separate bills, and mixing them is the most common source of quote confusion. The charger itself is hardware you or the electrician purchases. The labor is the skilled work of installing the circuit, mounting the unit, and testing everything. FLO's home charger installation cost guide makes this split explicit: its installation estimate excludes the charging station price entirely.
That distinction matters when you compare bids. One contractor may quote a higher labor figure because the run is long and the panel work is fussy; another may quote low and plan to add charges later. Ask every bidder to state equipment and labor as separate lines.
What a Level 2 Charger Installation Range Includes
A complete Level 2 install covers the circuit run, the breaker, the mounting hardware, the connection to the charger, and the final safety test. Qmerit's Level 2 charger cost breakdown frames residential Level 2 installation as a range rather than a single figure, which reflects how much the panel and the wire run vary from home to home. When you read a range, check whether it includes the charger, the permit, and any drywall repair. Most do not include all three.
Level 2 Charger Installation Requirements That Drive Price
The requirements that move your price most are amperage, panel capacity, and whether the charger is hardwired or plug-in. A Level 2 charger needs a 240-volt dedicated circuit, and the amperage you choose determines wire gauge, breaker size, and how much headroom your panel must have. Higher amperage means faster charging and thicker, more expensive wire.
Location drives cost too. An indoor garage install on a short run is the simplest case. An outdoor or detached-garage install adds conduit, weatherproofing, and often a longer wire pull. If you are coming from a standard 120-volt outlet, expect the jump to 240 volts to be the single biggest change in the project.
Hardwired Versus Plug-In Installation
A hardwired charger connects directly to the circuit with no outlet, while a plug-in charger uses a 240-volt receptacle such as a NEMA 14-50. Hardwiring usually costs a bit more in labor but allows higher amperage and avoids the cost of a heavy-duty receptacle. Plug-in gives you the option to unplug or swap the unit later. For most homeowners charging overnight, either works; the decision usually comes down to whether you want maximum charging speed or future flexibility.
When You Need an Electrical Panel Upgrade for EV Charger Circuits
A panel upgrade becomes necessary when your electrical panel has no open slots or cannot safely carry the added load of a charging circuit. Older homes with 100-amp service often hit this wall. EnergySage notes that a full panel upgrade runs into the thousands, while a subpanel is a smaller middle step for homes that need more breaker space but already have capacity.
Before assuming you need a full upgrade, ask the electrician to perform a load calculation. Sometimes load management devices let you add a charger without touching the panel at all, which keeps the cost of adding EV charger circuits far lower. We always run the calculation first, because a panel replacement you did not need is the most expensive mistake in this category.
EV Charger Circuit Permit and Inspection Costs
Permits and inspections are a real line item, and skipping them creates problems at resale and with insurance. Most jurisdictions require an electrical permit for a new 240-volt circuit, and the work must pass inspection before it is signed off. Permit fees vary widely by municipality, so we will not quote a number here; check with your local building department for the current fee schedule.
The inspection itself is typically folded into the permit process. A clean inspection requires the circuit to be properly sized, grounded, and protected, which is why the load calculation and material choices matter. NFPA 70, the National Electrical Code sets the baseline rules electricians follow, though your local code official has the final say on what passes.
Distance, Route, and Other Factors That Change Your Quote
Distance from the panel to the charger is the biggest single swing factor in any quote, and it is the one factor most quotes leave vague.
| Scenario | Typical run | What changes | Approx. circuit cost (materials + labor) |
|---|---|---|---|
| Charger on wall opposite panel, indoor garage | 10-20 ft | Short cable, little or no conduit | $450-$900 |
| Same garage, longer wall run | 30-50 ft | More cable, some conduit | $700-$1,400 |
| Through finished basement or wall | 30-50 ft | Fishing wire, patching, more labor hours | $1,000-$2,000 |
| Outdoor run to detached garage | 50-75 ft | Full conduit, weatherproofing, possibly trenching | $1,500-$3,500+ |
| Underground trench to a detached structure | 50-100 ft | Trenching, conduit, sweep fittings, inspection | $2,500-$5,000+ |
These ranges are not promises; they are the shape of the cost curve. The mechanism is simple: wire and conduit scale with feet, while labor scales with both feet and difficulty.
Route complexity in practice. Running wire through finished walls, across a basement, or underground to a detached structure adds labor and often repair work. A detached garage adds a second consideration: the circuit must be protected and grounded correctly at the outbuilding, and trench depth and conduit requirements are set by local code.
Other factors that move the number. Panel capacity (open slots and available amperage) can add a subpanel or upgrade. Hardwired versus plug-in changes the termination hardware and a receptacle cost. Indoor versus outdoor changes conduit and weatherproofing. Permit and inspection fees vary by municipality.
| Cost Factor | What Drives It | Typical Impact on Quote |
|---|---|---|
| Wire run length | Feet from panel to charger | Higher with every extra foot |
| Route complexity | Finished walls, underground, detached garage | Higher labor and repair |
| Panel capacity | Open slots and available amperage | Subpanel or upgrade if short |
| Hardwired vs. plug-in | Receptacle vs. direct connection | Plug-in adds receptacle cost |
| Indoor vs. outdoor | Conduit and weatherproofing | Outdoor costs more |
| Permit and inspection | Local fee schedule | Varies by municipality |
How to Compare EV Charger Circuit Quotes Apples to Apples
Comparing quotes fairly means forcing every bidder onto the same page. Start by asking each one for a written breakdown: circuit materials, labor, charger equipment, permit, and any panel work. Then confirm the wire run length and route are stated, the amperage is specified, and the permit is included. A low bid that omits the permit or the panel work is not actually lower.
Use this checklist when you review each quote:
- Circuit materials listed separately from labor
- Charger equipment price stated or explicitly excluded
- Wire run length and route described
- Amperage and breaker size specified
- Panel load calculation performed and documented
- Permit and inspection included or clearly excluded
- Hardwired or plug-in decision stated
- Warranty and cleanup terms in writing
At Hriczak Electrical Contracting LLC, we put every one of these items in writing before work starts, so there are no surprise charges halfway through. That is the difference between a quote and an estimate, and it is the standard you should hold every bidder to.
The cost of adding EV charger circuits comes down to a handful of variables: wire run, panel capacity, and permit rules. Get those documented in writing and the project stops being a mystery.
Frequently Asked Questions
How much does it cost to add a dedicated circuit for an EV charger?
Adding a dedicated 240V circuit is the smallest line item in most EV charger projects. Published cost guides list a new circuit at roughly $60 to $150 in materials, but that figure excludes labor, the wiring run length, conduit, and permit fees. The real number depends on how far the charger sits from the panel and whether your panel has open breaker slots. Ask your electrician for an itemized quote that separates the circuit from the charger hardware and any panel work.
What are the Level 2 charger installation requirements I should plan for?
A Level 2 charger needs a 240V dedicated circuit, typically on a 40 to 60 amp breaker, sized to the charger's rated draw. The circuit must be GFCI-protected where code requires it, and the charger location needs proper clearance and a suitable mounting surface indoors or outdoors. Your panel must have enough available amperage to carry the new load. An electrician confirms all of this during a site assessment before quoting, which is why two homes on the same street can get very different estimates.
Does adding an EV charger circuit require an electrical panel upgrade?
Not always. If your panel has open breaker slots and enough spare capacity, a new circuit can be added directly. Homes with older 100 amp service or panels already near their limit often need a subpanel or a full upgrade. Published guides put subpanel installation around $500 and a full panel upgrade at $1,500 to $4,000 or more. A load calculation performed by a licensed electrician tells you which category your home falls into before any work begins.
Do I need a permit and inspection for an EV charger circuit?
Yes, in most jurisdictions a new 240V circuit requires an electrical permit and a passing inspection before the circuit is energized. Permit fees vary by municipality and are usually a modest line item, but skipping the permit can complicate insurance claims and resale. The inspection confirms the breaker size, wire gauge, grounding, and GFCI protection match code. Build permit and inspection costs into your budget from the start rather than treating them as a surprise.
Can I use my dryer outlet to charge my EV?
A dryer outlet is a 240V circuit, so it can physically power a Level 2 charger with the right adapter, but it is rarely a good permanent solution. Dryer circuits are often only 30 amps, which limits charging speed, and sharing the outlet means unplugging the dryer every time you charge. Constant plugging and unplugging also wears the receptacle. A dedicated EV charger circuit gives you faster charging, safer continuous operation, and no conflict with other appliances.